Tested March 10, 2013
Zero Gravity Gravitas SL Brakeset
- Cost: $399 refurbished (without brake pads), new originally $875.
- Claimed weight: 138 grams without pads. Actual, 142 grams. 166 grams with pads
- Heritage of innovation; founder Ted Ciamillo revolutionized the aftermarket for bike brakes
- While one of the lightest brakes available, provides excellent stopping power
- Spacers accommodate a wide range of rims, from 19mm old skool to 27mm Zipp Firecrest
I first became aware of Zero Gravity brakes in 2004 when Iban Mayo used them at the Tour de France on the way to finishing in third place. In 2005, Francis, the founder off MTBR.com & Roadbikereview.com, got his hands on a set of the original OG-05 Ti calipers and wrote this review. After reading his review and seeing the brakes on Francis' bike, I ordered a pair immediately. They were incredibly light while also offering excellent braking. A few years later I also purchased the slightly heavier but stiffer Zero Gravity GSL's (230 grams) for another bike.
When the Gravitas came out in 2009, I was awestruck by the all carbon construction, weight, and $875 price. I did toy with the idea of buying these brakes but the price was just too steep. Luckily, I held out, which was a good thing because Zero Gravity has recently offered refurbished Gravitas brakes for $399. I couldn't resist at that price.
Installation

Ted gets some flak from the cycling community because his brakes are finicky to set up. And they are. However, I think cyclist need to understand and appreciate that Ted runs a boutique business.
It's a small shop and I'd venture to guess that Shimano likely produces more brakes in a week than Ted does in a year. Ted's brakes are like Ferraris; they require close tolerances and a mechanic who knows what he/she is doing. Unlike a Ferrari, however, once you get Zero Gravity brakes dialed in, they don't require constant tuning. I did email Ted because I was having problems installing my rear brake--and he responded very quickly, asking that I call him. He diagnosed the problem and I was able to get my brakes functioning correctly.
You will need seven tools to install these brakes (in addition to Campy 2000+ brake pads; brake pads are not supplied):
- 5mm and 3mm allen wrench. The 5mm is for the brake bolt, the 3mm is for the bolt that clamps the cable.
- 13mm or 1/2 inch cone wrench to hold the nut behind the brake. You also use this wrench to center the calipers.
- T-20 and T-30 Torx bits. The T-20 is for the brake pads. The T-30 is to adjust the tension of the brake calipers. If the brake is "sticky" and doesn't return fully, loosen the brake bolt then hold the nut with the cone wrench and rotate the front-facing Torx bolt counter-clockwise with the T-30 bit.
- Electrician's tape. Place the tape around the nut to prevent scratches.
- Cable cutters for housing and cable.
There are a few tricks to the install. First, do not compress the brake by pushing in the brake by the brake pads with your fingers. This can weaken the return spring. Secondly, make sure to trim the brake cable so when inserted into the barke arm it doesn't push the brake to one side. Additionally, make sure it isn't too short which would make the brake pivot to the other side.
The brakes also come with 3 sets of washers for the brake pads. There is a washer with a flat side and concave on the other. The washer with the flat side needs to have the flat side flush with the brake; the concave side mates to the brake pad holder. There are 2 additional spacers that are bent on both sides; one thick and one thin. Use all three if your rim is a narrow 19mm wide. Remove the two bent spacers if you are running super wide Zipp & Hed wheels. For rims that are in between, experiment to see what fits best. I tried using the rear brakes with just the flat/concave washer on my Easton EA90 SLX rims and braking performance wasn't great. Adding the thick spacer improved braking dramatically.

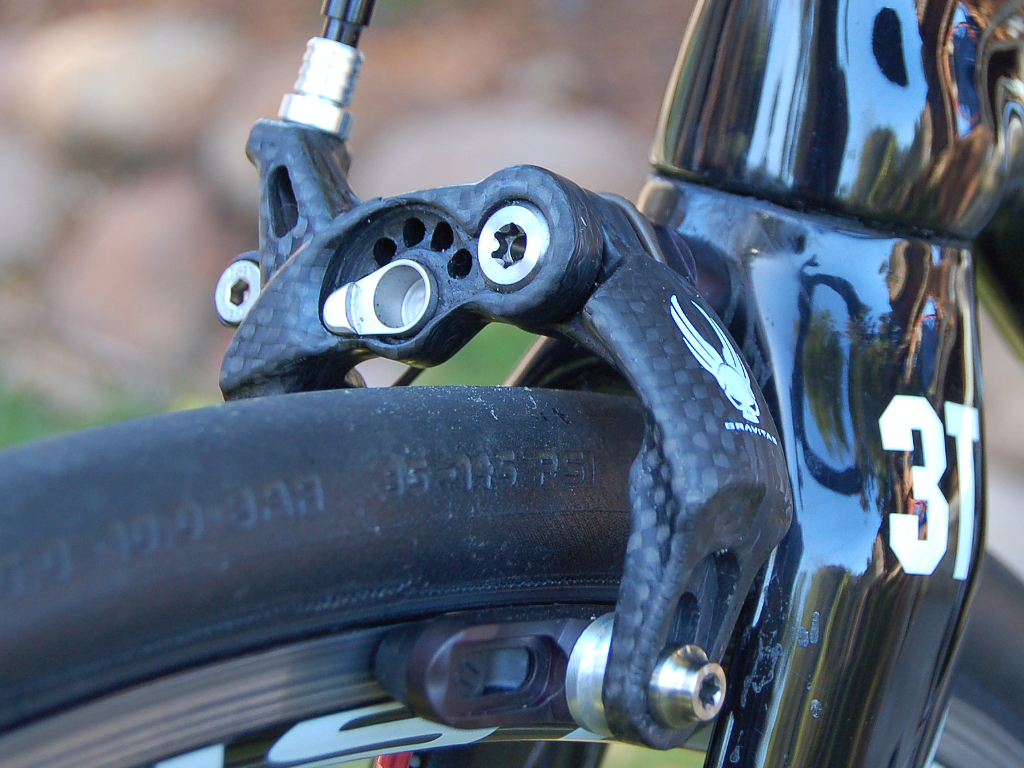
Another neat feature is the routing of the cable through the cinching bolt. You thread the cable through the brake arm and then behind the cinch bolt through a pre-drilled hole. This is a nice feature that guarantees alignment while also making it easier to secure.
Cable threading to cinch bolt 
Lastly, the brakes are designed to have the most leverage with very little pull on the levers. Ted advises just 1mm of clearance between the shoes and the rim. So make sure your cable is tight and raise the cam arm while adjusting. You can pinch the brake pads against the rims while doing this without potentiall weakening the return spring.
Weight

It is remarkable how Zero Gravity revolutionized the after-market brake market so many years ago. Nine years later, the Gravitas continues this tradition. It is impressive how Zero Gravity has continued to push the envelope of light weight without a sacrifice in braking performance. If you review the chart below, you'll notice how the Gravitas is the second lightest brakeset while also being priced the same as the much heavier Campy Super Record and new Dura Ace.
Performance
Once dialed, the brakes are extremely impressive. You can lock up the wheels easily if needed. Even the rear brake will "skid" the tire when applied on it's own. There is less modulation than, say, Shimano Dura Ace, but that doesn't bother my riding style. In fact, this past weekend, I went on an epic 58 mile ride with some huge descents without any complaints. This said, I am more of an abrupt stopper and I don't really feather the brakes. If you are someone who likes to modulate the brakes in fine increments, this may not be the brake for you.
Design
These brakes are flat out awesome looking. From the carbon weave to the cool logo, they draw attention. The braking performance while being super light have the performance to back it up. The thoughtful brake cable installation and ability to adjustments to reduce friction are also very impressive features.
Rear brake

Summary
These brakes are incredibly light weight, look great, and provide excellent stopping power. And, especially if you buy the refurbished set, you are getting a relatively great deal for the money.
Rating: 4.5 stars; the refurbished brakes are a good value for a superlight brake that provides excellent stopping power. You just need to be patient with the install.
Rear cable routing